Long‑exposure photography lets you turn time into texture. By using slower shutter speeds you capture motion, light trails and atmosphere that are impossible with a standard snapshot — and that makes it especially powerful after dark. This guide walks you through the core techniques, recommended kit and creative approaches to lift your night work. Many photographers come away from night shoots with photos that are soft, noisy or underwhelming; mastering long exposures changes that. Read on for practical settings, location tips for London, post‑processing notes and a look at when it makes sense to call in a professional.
Long‑exposure photography is about controlling time: the shutter speed, aperture and ISO combine to capture movement and light over a period rather than a single instant. Getting to grips with these basics is the fastest way to get consistent, expressive results.
Shutter speed controls how long light falls on the sensor — the longer it’s open, the more motion and light you record. Aperture governs how much light reaches the sensor and affects depth of field; ISO sets the sensor’s sensitivity. For cleaner long exposures, keep ISO low (100–200) to reduce noise, and use a narrower aperture (higher f‑number) when you need greater sharpness through the frame. A typical starting point for night cityscapes might be 10 seconds at f/8, ISO 100 — then tweak from there depending on the scene and desired effect.
Bulb mode lets you hold the shutter open for as long as you like — useful when your required exposure exceeds the camera’s built‑in limits. Always use a remote or cable release (or the camera’s timed remote features) to avoid introducing camera shake. Bulb is ideal for extended vehicle light trails, painting with light, or star‑trail work where exposures run well beyond standard shutter speeds.
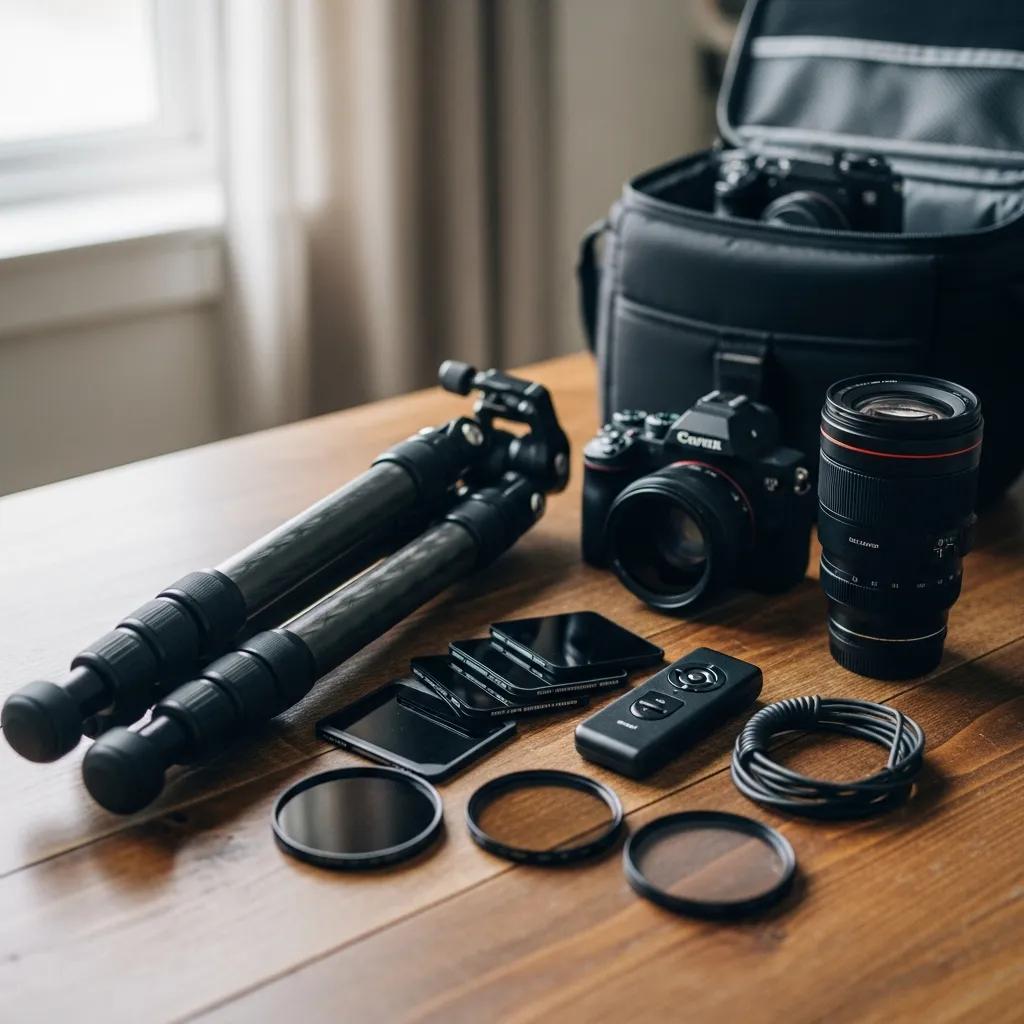
Good technique starts with sound kit. The right equipment won’t replace practice, but it does make long exposures practical and repeatable — and improves image quality.
A solid tripod is the foundation of every long‑exposure image. Even tiny vibrations will blur fine detail during extended exposures, so choose a tripod that balances weight, rigidity and portability for the locations you shoot. A stable head and firm leg locks matter as much as the centre column — keep the camera rock‑steady and composition remains predictable shot to shot.
Neutral density (ND) filters cut light without altering colour, letting you use longer shutter speeds in bright conditions. They’re indispensable for smoothing water, blurring cloud movement or creating motion effects in daylight. For strong daylight effects you might reach for a 10‑stop ND; less extreme scenes can work well with 6 or 8 stops. Always expose carefully and check your histogram — heavy ND use changes exposure planning.
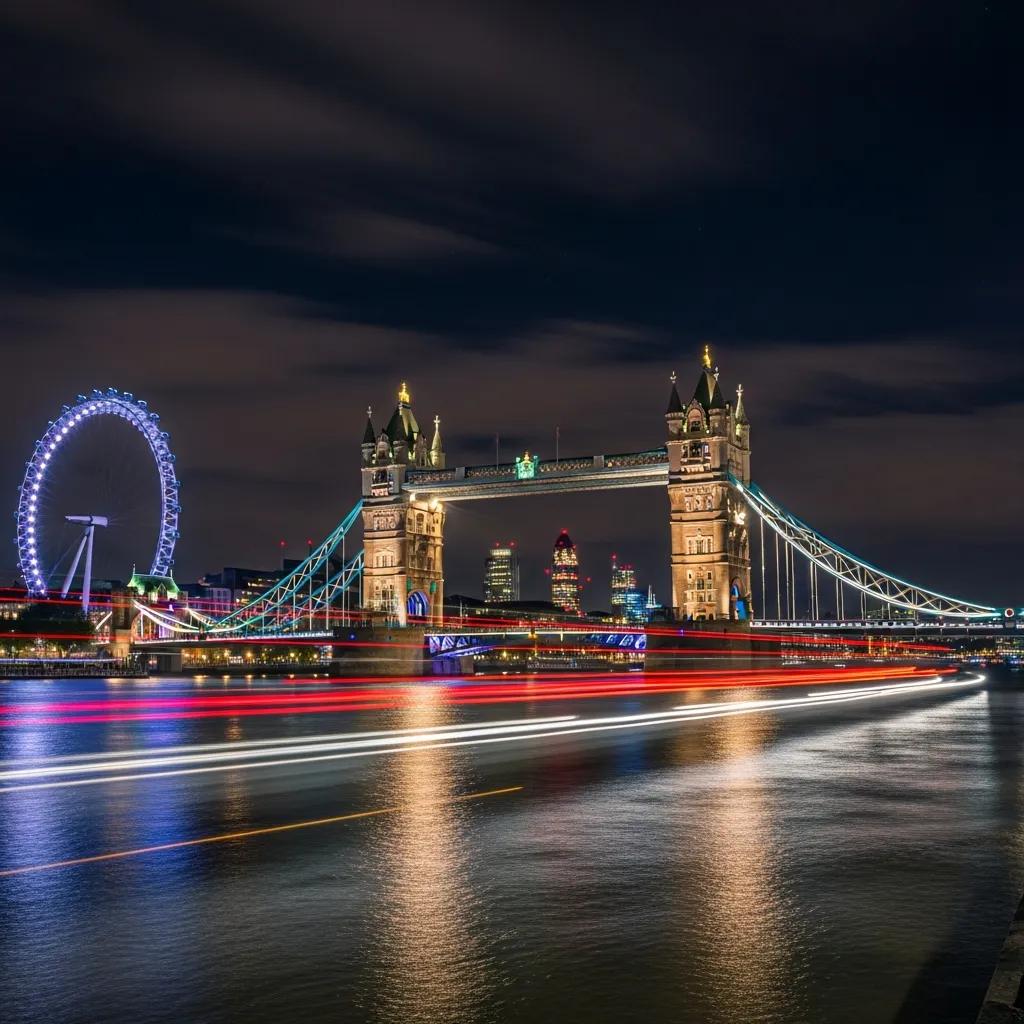
London’s mix of historic architecture, river reflections and busy streets makes it a playground for long‑exposure photography. With a few location‑specific tips you can turn familiar scenes into atmospheric, cinematic images, capturing the art of lightroom.
Some top spots to try in London:
Each location rewards different approaches — experiment with shutter speed and framing to find your vision.
Light trails and motion blur introduce energy and direction into a frame. Use slow shutter speeds (for example 10–20 seconds) to record vehicle trails or the soft motion of crowds; position yourself to use leading lines from roads, bridges or railings to guide the eye. Try mixing static foreground elements with moving highlights for drama — the contrast between stillness and motion is what makes these shots sing.
Long exposures open up many creative doors — from subtle mood changes to bold, graphic experiments. Use the techniques below to add variety and personality to your portfolio.
For silky water try multi‑second exposures; the exact time depends on water speed and light, but 1–30 seconds often works for rivers and small falls, while longer exposures create a glass‑smooth look on larger bodies of water. For streaked clouds, shoot during periods of sustained wind and use exposures from 30 seconds up to several minutes. A tripod, remote release and ND filters (for daylight) are essential for these techniques.
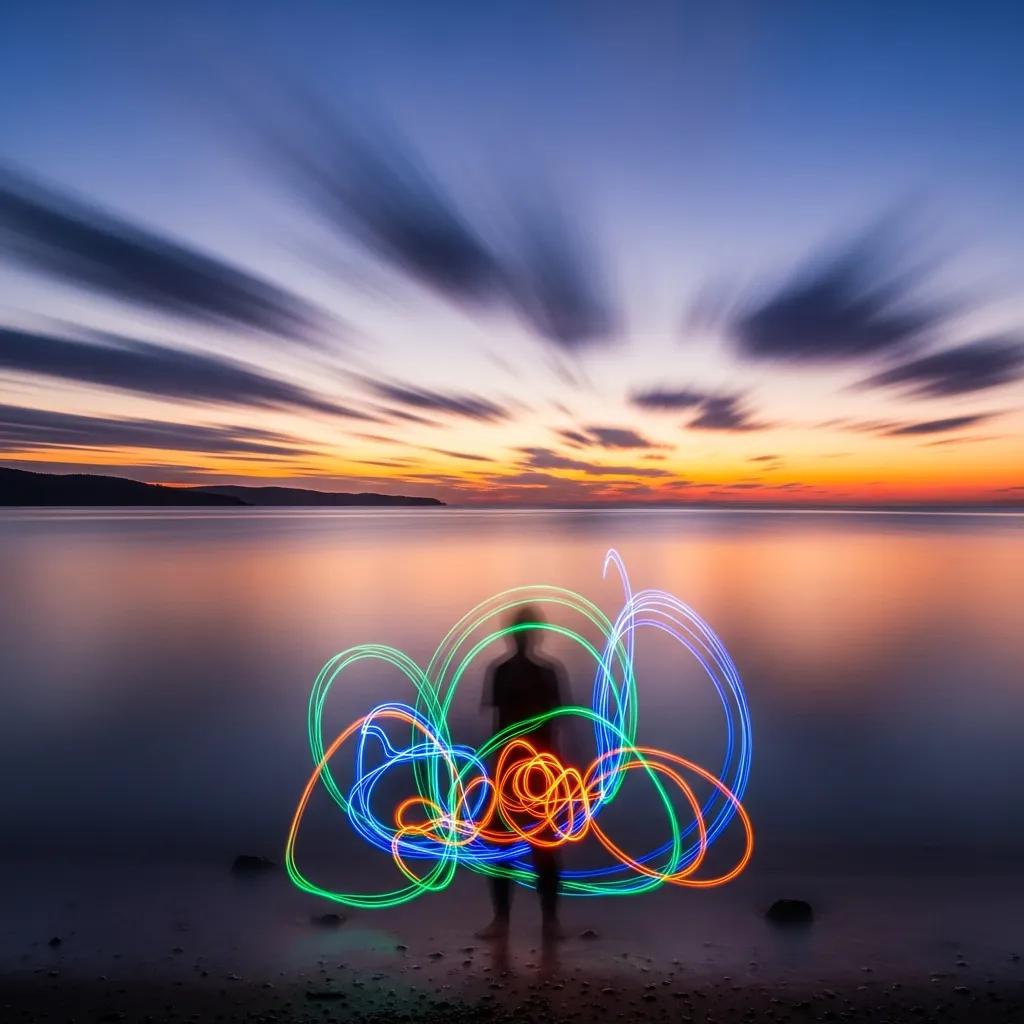
Light painting uses hand‑held lights to add painted elements to a long exposure. With the shutter open, move a torch, LED wand or coloured gel to trace shapes or accents across the scene. Light painting can highlight foreground subjects, add abstract forms or create portraits with a dramatic edge. Plan your moves beforehand and practise to control where the light falls.
Post‑processing refines what you capture in camera. Thoughtful editing can reduce distractions, enhance mood and bring out the best in long‑exposure shots without overcooking them.
Noise reduction is often necessary for long or high‑ISO exposures — use conservative denoising to preserve detail and texture. Shoot RAW so you retain latitude for adjustments. For colour grading, subtlety is usually best: small tweaks to white balance, contrast and tone curves often produce the most natural, cinematic results. Use local adjustments to boost light trails or control highlights and shadows where needed.
Blending exposures lets you combine the strengths of different frames — for example, a clean sky from one exposure and richer light trails from another. Techniques range from simple layer masks in Photoshop to more advanced focus‑stacking or exposure‑blending workflows. The result can be a more detailed, balanced image that preserves highlight and shadow information while enhancing motion elements.
Professional long‑exposure work brings technical know‑how and creative judgement that’s hard to match when you’re learning on the fly. For brands and individuals aiming to elevate their visual storytelling, specialist skills deliver consistent, on‑brand images that perform across web, print and social channels.
Long‑exposure images stand out: they convey movement, atmosphere and attention to craft. That makes them useful for marketing where mood and distinction matter — hero images, social campaigns and editorial spreads can all benefit from the cinematic quality long exposures provide. The technique helps brands communicate energy, time‑lapse narratives or a premium aesthetic that attracts attention.
Book a session with EyeMedia Studios and expect a consultative process tailored to your brief. Lead photographer Bill Gidda brings over 30 years’ experience and will advise on location, timing and composition to achieve your goals. We handle planning, capture and careful post‑processing to deliver modern, high‑resolution images that reflect your vision and work across your marketing channels.
Different pieces of kit play specific roles in a long‑exposure workflow. Here’s a quick comparison to help you prioritise purchases.
To get the most from your long‑exposure work, keep these practical tips in mind:
Follow these guidelines and you’ll build stronger technical control and a more varied, compelling portfolio of night work.
Begin with a shutter speed between 5 and 30 seconds, ISO 100–200 to keep noise low, and an aperture around f/8–f/11 for a good balance of sharpness and depth of field. Use a tripod and check your histogram; then adjust exposure time and aperture to taste depending on how much motion or star‑movement you want to capture.
Yes — with ND filters you can extend shutter times in daylight to smooth water, blur people or create dreamy skies. Choose the ND strength to match the light: stronger filters (e.g. 10‑stop) for bright sun, lighter filters for overcast or low‑sun conditions.
Composition is everything. Use the rule of thirds, leading lines and foreground interest to give motion something to play against. Static elements provide contrast to moving lights and clouds, so plan foreground, middle ground and background carefully to create depth and narrative.
Prevent overexposure by using low ISO, a smaller aperture and, where necessary, ND filters to cut light. Review your histogram after each shot and bracket exposures if the scene has a wide dynamic range — that gives you more flexibility in post.
Common pitfalls include skipping a tripod, forgetting to lock down the camera, using unnecessarily high ISO, and not planning composition. Test your settings, use a remote or self‑timer, and take multiple frames so you can choose the best shutter result.
Set a long exposure, then use a torch, LED or coloured light to “paint” while the shutter is open. Start with simple accents to light or outline a subject, then build up more complex shapes as you gain control over timing and exposure. Practice makes it easier to place light where you want it.
Long‑exposure photography is a powerful way to reinterpret night scenes and reveal mood, motion and detail that ordinary shots miss. With the right technique, kit and a little experimentation you can create images that elevate your portfolio and strengthen your visual storytelling. Embrace the process, practise regularly and use these tips to transform your night photography in London and beyond.