Sharpness is everything in macro work — it’s how texture, structure and tiny details become visible. Focus stacking is a reliable technique that stitches multiple shots taken at different focus distances into a single image with extended depth of field. In this guide we explain how focus stacking works, the benefits it brings to macro photography, and the kit and software we use to get consistently clean, detailed results. Many photographers struggle with the shallow depth of field that comes with close‑up lenses; focus stacking solves that by combining overlapping focal slices into one razor‑sharp frame. Read on for a clear workflow, practical post‑processing tips and why you might choose flash macro for precision macro captures.
Focus stacking means taking a sequence of images of the same subject, each focused at a slightly different distance, then merging them so every part of the subject is in focus. That pooled information eliminates the narrow plane of focus you usually get in macro shots and produces a final image with consistent sharpness across foreground and background. For close‑up work, this technique reveals detail you simply can’t achieve with a single exposure.
The technique depends on capturing multiple focal planes in sequence. Each frame in the set is targeted to a different area of the subject so, when combined, the stacked file contains sharply rendered detail from front to back. That makes focus stacking especially useful in macro photography, where tiny shifts in focus matter a great deal. When executed correctly, it lets you render complex subjects with clarity and nuance.
Depth of field is the zone that appears acceptably sharp in an image. At macro distances this zone is extremely narrow. Focus stacking overcomes that limitation by blending many narrow zones into a single image that looks sharp throughout. The result is a more immersive, detailed photograph without relying solely on stopping down the aperture — and without the diffraction trade‑offs that can reduce resolution.
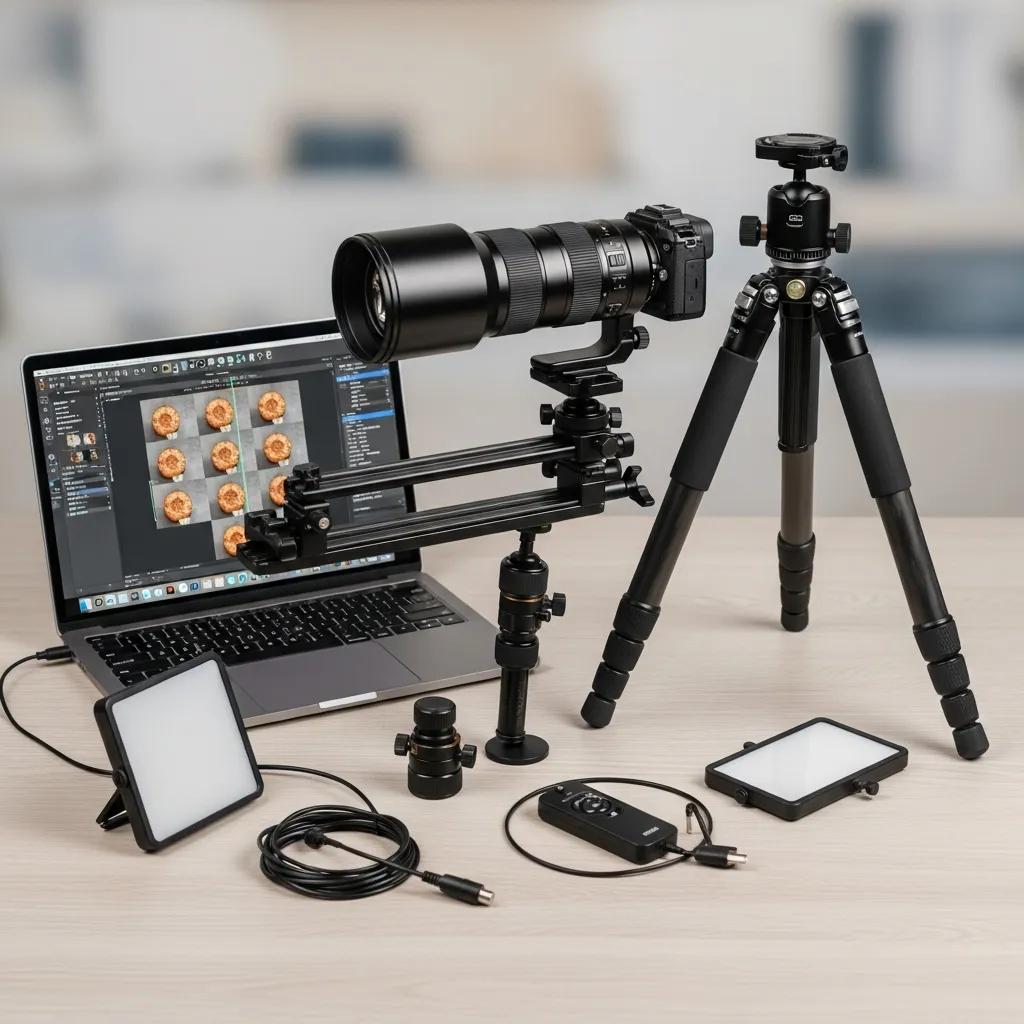
Good results start with the right kit and continue through to capable software. The combination of a true macro lens, stable support and reliable stacking software has a major influence on the final image quality.
When picking glass and settings, look for tools that help you balance magnification, sharpness and control. A few practical pointers:
Several dedicated and hybrid tools speed the stacking workflow and give reliable blends. Common choices we use or recommend include:
Each option helps streamline stacking in different ways; choose the one that suits your workflow and the level of manual control you want.
A clear, repeatable workflow reduces errors and speeds up delivery. Below is a practical sequence that we follow for reliable, sharp results.
Careful prep is where most successful stacks begin. Key setup steps include:
When shooting, move through the focus range in small, consistent steps and overlap the focus regions slightly to ensure seamless blending. The typical post‑capture process is:
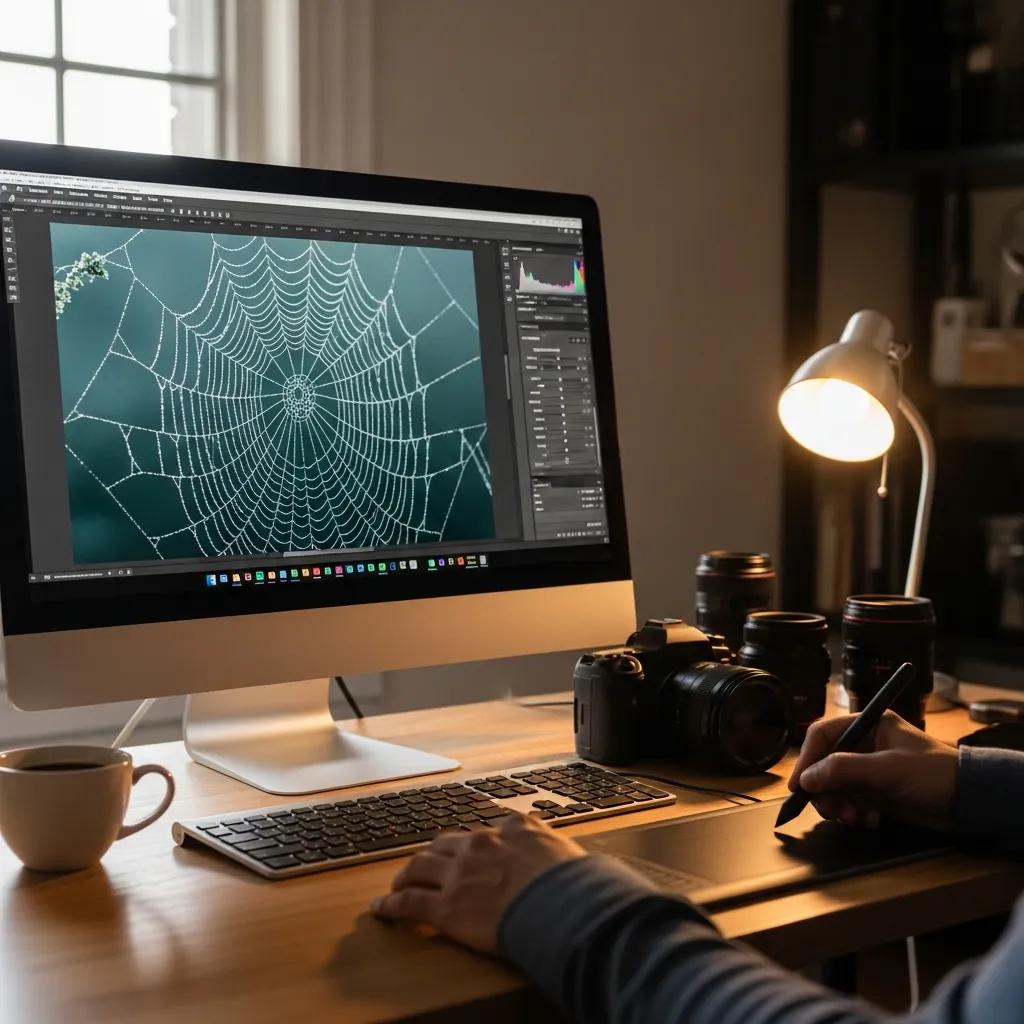
Stacking delivers a sharp base, but careful post‑processing refines detail and ensures the final file looks natural and polished.
After the stack is created, apply targeted adjustments to enhance perceived clarity without introducing artifacts:
Certain missteps can undermine an otherwise good stack. Common issues include:
Bringing in a professional team elevates the outcome through experience, equipment and workflow discipline. That matters when detail and consistency are mission‑critical.
At EyeMedia Studios we combine specialist lenses, controlled lighting and proven post‑processing workflows to produce sharp, repeatable results. Our clients benefit from:
High‑quality macro and product imagery communicates craftsmanship and attention to detail — useful for portfolios, advertising or product listings. Professional focus stacking ensures every detail reads clearly, strengthening brand perception and making technical imagery usable across channels.
Consistent, diffused light is essential. Softboxes, reflectors or continuous LED panels reduce harsh shadows and maintain even exposure across every frame in the stack. Avoid direct sun or mixed light sources that change between shots. When lighting is stable and even, blending the frames produces a far more natural, seamless result with product photography.
Use a strong tripod and lock your composition so the camera doesn’t move between frames. Overlap focal slices slightly to avoid gaps. Most stacking programs include automatic alignment — but if there’s any parallax or movement, you’ll need to correct that in software or reshoot with a more rigid setup.
Focus stacking is particularly powerful for macro, product and some landscape work where front‑to‑back sharpness is desirable. It’s less relevant for traditional portraiture or scenes where a shallow plane of focus is part of the intended look. Evaluate the subject and creative intent before choosing photo stacking software as your technique.
Avoid too large focus steps, inconsistent lighting, and camera movement between frames. Also take care not to over‑process the final stack — excessive sharpening or aggressive local edits create unnatural results. Proper overlap, steady support and controlled lighting are the best ways to prevent problems.
Stacking is difficult with moving subjects because each frame must match precisely. For slight motion you can use very fast shutter speeds, but generally stacking is best reserved for stationary subjects. For dynamic scenes, consider alternative techniques like high‑speed capture or exposure blending.
Traditional depth‑of‑field control relies on aperture and distance, which can force you into diffraction limits at very small apertures. Focus stacking achieves a deep apparent depth of field without the same diffraction trade‑offs by combining multiple sharply focused slices — giving greater detail and clarity across the subject.
Recommended gear for reliable stacks includes:
While software does the heavy lifting for blending, you still need multiple in‑camera focus points to create a proper stack. You can’t generate accurate depth information purely in post without capturing the focal slices first — the best results start with a well‑shot sequence and finish in the editor.
We’re committed to producing technically precise and visually engaging imagery. With focused experience in macro techniques — including focus stacking — our team combines specialist equipment with disciplined workflows and careful retouching to deliver images that meet professional standards for clarity and colour. Whether we’re working with independent artists or commercial brands, our aim is the same: produce images that reveal the fine details your audience needs to see.
This guide shares our practical knowledge of focus stacking to help photographers improve their workflow and to inform clients considering professional imaging services. Rely on our experience when you need consistent, high‑quality close‑up photography.
Mastering focus stacking opens a new level of clarity in macro photography, allowing you to capture intricate detail from edge to edge. With the right combination of equipment, disciplined capture and careful post‑processing, both hobbyists and professionals can produce outstanding results. If you want to push your macro work further, explore our services and see how EyeMedia Studios can help you achieve consistently sharp imagery.